


 Sign in
 Register now
 My Reward Points
Neem is known for its antibacterial and antifungal properties. You can also make a DIY homemade neem soap for pimple-free skin. Let’s see how to make and use the soap made from ingredients like Neem leaves, Turmeric, and Aloe Vera gel!

Therefore, the bacteria and fungi that are responsible for the formation of acne and pimples can be treated by including Neem in your skincare recipes. DIY Neem soap purifies the skin and improves its texture and tone, it can prove to be a great ingredient for your soap recipes.
Why Neem Soap is Good For Skin?
Clearing the bacteria and oil from your skin, it plays a great role in pimple prevention. Moreover, its healing properties ensure that your skin becomes soft, fresh, and pimple-free!

Neem Soap promotes a clear complexion by removing the debris of dirt, dead skin cells, and other toxins from your skin cells. It also soothes dry and sensitive skin due to its anti-inflammatory properties.
Homemade Neem Soap Benefits For Skin
Now that you know why Neem Soap is good for your skin, it's time to dive deeper into its benefits. Neem is a natural moisturizing ingredient that also soothes rashes and skin irritation. The essential benefits of Neem Soap are highlighted below:
1. Antibacterial - The bactericidal properties of Neem are no longer a secret. Due to its antibacterial property, Neem leaves or Neem extract are often used in anti-acne creams and lotions. It also curbs pimples by eliminating the toxins that are responsible for its formation.
2. Treats Acne - The antibacterial and fungicidal properties of Neem make it effective against acne and pimples. Moreover, the strong antioxidants present in it helps to soothe the skin and get rid of acne and pimple marks. As a result, it is an ideal ingredient to get rid of acne and pimples.

3. Moisturizes Skin - Neem Oil contains Vitamin C that nourishes the skin and enhances its glow. It also helps to treat aging symptoms like wrinkles and fine lines. It also provides relief from blackheads and dry skin. Reducing skin inflammation soothes dry and irritated skin.
4. Removes dirt & toxins - Soap making made with neem oil is an effective skin cleanser as well. It reaches deep in your skin pores and removes the oil, dirt, dust, dead skin cells, and other impurities from them. As a result, your skin gets cleansed and appears to be light and fresh after applying it on the face.
5. Balances pH level - Neem has the ability to balance the natural pH level of your skin. It makes skin supple and soft and due to its balancing effect, it is also used to cleanse hair and get rid of dandruff. By maintaining the pH level of your scalp, it also aids in the prevention of dandruff formation.
How To Make Neem Soap Recipe at Home
Try this simple recipe to clear your pimple within a month. This recipe is moisturizing and fights bacteria and infection effectively.
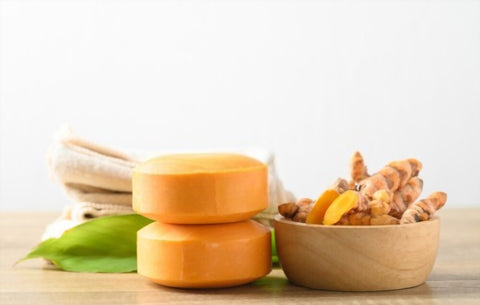
Recipe 1: Neem & Turmeric Soap Making
The combination of Neem and Turmeric is perfect for keeping your skin healthy and blemish-free. Turmeric is antibacterial and anti-inflammatory in nature and it also contains powerful antioxidants that protect your skin. It also aids in skin brightening.
Neem Soap Ingredients:
- Glycerin Soap Base - 250 grams
- Neem Leaves - 25 to 30 leaves
- Turmeric Powder - ½ tbsp.
- Vitamin E Oil - 2 to 3 capsules
- Neem Essential Oil - 4 drops
Recipe For Making Neem Soap At Home
- Collect All Neem Soap making ingredients near to you and also pre-measured all the quantities required, It will help us at a later stage.
- Let's Begin with grinding the neem leaves in a blender. Blend it directly and don’t make it smooth by adding water.
- Add the Turmeric Powder to the ground Neem leaves. Now, break the Vitamin E capsules and add the solution to the mixture.
- Add organic Neem Essential Oil to the mixture. It will not only enhance the fragrance of your homemade soaps but will also increase its therapeutic benefits.
- Use a spoon to mix all the ingredients nicely. Cut the soap base into small pieces now. Melt the soap base in a microwave or use a double boiler.
- Finally, add the mixture to the soap base and stir it nicely. Transfer the content to the soap mold and let it sit for 12 to 24 hours.
How to use DIY Neem Soap?
Let the soap cure for 48 hours and then remove it from the mold. Cut it into smaller pieces and use it as your regular soap to get rid of the pimples on your face.
Recipe 2: Neem and Aloe Vera Soap Recipe
Aloe Vera is another ingredient that goes well with Neem. When added to your Neem Soap Recipe, it enhances its moisturizing and healing properties. It also beautifies your skin and heals minor cracks and rashes. Let’s see how the soap is made now!

Ingredients For Aloe & Neem Soap:
- Fresh Aloe Vera Gel - 2 tbsp.
- Glycerin Soap Base - 250 grams
- Neem Leaves - 30 Leaves
- Neem Oil - ½ tbsp.
Recipe For Making Aloe Vera & Neem Soap
- Blend the neem leaves and mix Neem Oil and Aloe Vera Gel in it.
- Mix the contents nicely by using a spoon.
- Melt the soap base in a double boiler setup or microwave.
- Transfer the mixture when the soap base melts.
- Remove the mixture from heat and pour it into the soap mold.
How to use DIY Neem Soap?
This soap recipe will be set within 12 hours. However, it will need another 24 to 36 hours to cure completely. Once the soap is cured, you can remove it from the mold and cut it into pieces as per your preference. You can now use the soap regularly for washing your face and body.
Conclusion
We hope that you understood how to make DIY homemade Neem Soap with a few ingredients. The ingredients that you incorporate in your DIY soaps must be completely natural and chemical-free. Therefore, get them only from trusted and authentic sources. Enjoy the Neem soap-making process and make your face clear and spotless!.


