Halloween may seem far at the moment, but we can assure you it will be here before you know it, and it's time to start planning your decorations. Halloween is a fantastic holiday. Even if you aren't a fan of goblins and ghosts, there are still some amusing things to do.

Candles are great for creating a spooky and eerie atmosphere, so they're perfect for Halloween decor as well. Today we will learn to make our own Halloween candles for decoration, If you don't want to use standard black candles for your Halloween decorations.
How To Make Candle For Halloween
If you enjoy Halloween decorations, we are sure you'll enjoy making this simple yet spooky Halloween candle at home. It is also perfect for a Halloween present. So if you're looking for something creepy to give to a pal, you have come to the perfect place. This is what candle making supplies you need:

Supplies For Halloween Candle:
- Soy Wax Flakes
- Pre-Tabbed Candle Wicks
- Glass Containers
- Candle Dye - Black And Orange
- Fragrance Oil
Other Materials Required:
- Medium Sized Sauce Pan
- 2 Glass Measuring Cups Or Pouring Pots
- Stove
- Wick Holder
- Wick Stickers Or Glue Gun
- Glass Thermometer (Optional)
- Dixie Cups (Optional)
Know About Halloween Candle Making Supplies
The stars of this DIY project are wax dyes in black and orange. These are the signature colors of Halloween and all things spooky. We also use clean-burning soy wax flakes in this recipe to ensure that this candle is 100% safe for you and your family. Read on to know more about the supplies for this project.
- Soy Wax Flakes: Soy wax is a sustainable natural resource made from soy beans. Soy wax is biodegradable and can be cleaned with just water and soap. Soy candles burn slower and longer than paraffin candles because soy wax has a lower melting point than paraffin wax.
- Pre-Waxed Candle Wicks: Wax Coated Candle Wicks are used to manufacture a number of different types of candles. These cotton candle wicks are pre-waxed and emit very little smoke, making them perfect for household use. They're also constructed in such a way that they burn for longer, don't curl, and don't leave cotton ashes behind.
-

- Glass Containers: As part of the décor, glass candles look fantastic. Glass candles are frequently used by interior designers to stage any space in the house, including living rooms, baths, and workplaces. Because of the transparency of glass, there is no light barrier, allowing the candle flame to shine through freely.
- Candle Dyes: Candle dye is a synthetic chemical that is made specifically for use in candle wax. Powdered dye is best for candle making, whereas liquids are wonderful for combining colors and creating high color saturation. Because dyes are UV light sensitive, keep them in a shady spot away from direct sunlight.
- Fragrance Oils: Fragrance oils are reasonably affordable and will not put a strain on your budget. Candle fragrance oils have a calming effect, making them a fantastic addition to your home decor. Allow the aroma to drift throughout your home to convert it into a day spa.
DIY Candle For Halloween at Home - Step by step
Everyone is a big fan of candles. They're beautiful to look at, offer a nice amount of light to a space, and usually even smell wonderful. So simply get creative and create your own. Here's a step-by-step description:
Step 1: Attach Your Wicks
Attach wick stickers to the metal tabs on the bottoms of your wicks to make them ready for your candles. You may also apply a little dab of glue on the wick tab using a hot glue gun. Then carefully insert the wick into the bottom of the glass container.

Attach the wick to a wick holder that has been placed over the top of your glass container. You may also tie the wick around a pencil and lay it on top of the container to keep it from falling out. Make sure the wick is standing straight up in the center of your glass.
Step 2: Measure And Melt Your Wax
Because we're making dual-colored candles, measure how much wax you'll need to fill each container. Wax flakes will melt down to around half their original size. Thus, anticipate that your containers will need to be filled to the brim twice as much.

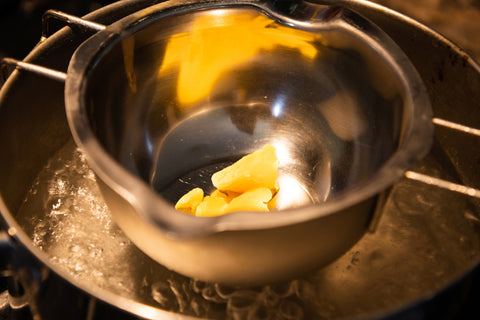
We'll use a double boiler technique to melt your wax. This is mostly a safety measure to ensure that our wax does not overheat. Simply fill a medium saucepan or pot halfway with water and heat on medium – high. Fill one of the measuring glasses with wax. As the wax melts, stir it occasionally.
Step 3: Add Color and Fragrance Oil
When the wax reaches a temperature of 185 degrees F, candle color dye and scent can be added. If you don't have a glass thermometer, skip this step and wait until the wax is completely melted.

- Add the dye to the mix. We recommend dyeing these candles using double the amount of dye recommended on the package because soy candles typically turn out pastel when dyed with the recommended amount.
- Add the fragrance oil. Remove the wax from the source of heat. Now you may whisk in your preferred amount of fragrance oil into the heated wax. You may also use essential oils to scent your candle. Combine the oils in the wax and stir well.
Step 4: Pour The First Layer
Pour the first measuring cup of melted wax into your glass container, taking care not to leak it down the sides of the container.

Note: Depending on how many layers you want to add, you may vary how much you pour into your initial layer. Remember that each layer must firm before moving on to the next, so the more layers you apply, the longer the procedure will take.
Step 5: Add Additional Layers
- Allow the preceding layer to cool and firm fully. This will take at least 30 minutes, but it is necessary to guarantee that the colors do not bleed together when you pour the next layer of heated wax in.
- While this is going on, prepare the next color to be poured by filling a second measuring cup with wax and repeating the melting and coloring procedure from steps 2 and 3, substituting the first color with the second color chosen.
- When the wax in the glass container has set, pour in the melted wax of the second hue, being careful not to leak on the sides of the glass.
- Allow time for the layer to cool.
Note: Step 5 should be repeated until all subsequent layers have been completed.
Step 6: Trim The Wick

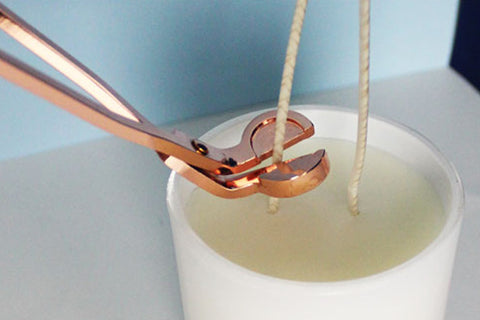
When you've completed adding all of the layers you want to your candles, trim the wick with scissors to approximately 1/4 inch of wick left above the wax.
Step 7: Decorate Your Candle
Your Halloween candle is now ready. To add some extra spookiness to it, paste some ghost and skull stickers on the glass jar, and you are good to go for celebrating Halloween with candles.
Conclusion
Halloween is all about getting spooky while having a good time. However, there are occasions when you want something genuinely spooky yet classy to add that much-needed 'oomph factor' to your Halloween decorations while keeping things as basic as possible.
It's about a theme centerpiece that doesn't take up too much of your time or money. The best part? All the supplies used in this project are 100% safe and pure and can be bought from VedaOils.


 Sign in
 Register now
 My Reward Points


