

The world of fascinating soaps is a bubbly journey, and we can't resist immersing ourselves in it. Whether you are a DIY enthusiast, a skincare aficionado, or simply someone curious about the art of creating handmade saps, you must come to the right place.

In this blog, we will explore the various soap making method and help you discover the one that suits you the best. From traditional cold processes to convenient melt-and-pour soap-making techniques, we will be discussing all the available ones so that you can explore all the possibilities for your hobby of creating soaps.
What is Soap?
Soap is a versatile cleansing agent used for centuries to clean and nourish the skin. It is a combination of fats or oils, such as coconut or olive oil, and an alkali, typically sodium hydroxide (lye), which undergoes a chemical reaction called saponification. There are many soap making method available.
This reaction transforms the fats and oils into soap molecules, known as fatty acid salts. Soap has played a significant role in personal hygiene and cleanliness throughout history, and its creation has evolved into an art form, allowing individuals to craft unique and nourishing products tailored to their preferences.
Finding The Perfect Soap Making Method For You
Discovering the ideal soap making method is like finding a recipe that perfectly suits your taste. This section will guide you through the diverse world of soap making, highlighting the various methods available.
1. Cold Process Soap Making
Cold process soap making is a traditional method that allows you to create beautiful, customized bars of soap from scratch. This process involves combining oils and fats with an alkali, such as lye, and allowing them to undergo saponification over time. Follow these step-by-step directions to embark on your cold-process soap making method.

- Prepare your workspace by ensuring it is well-ventilated and wearing protective gear such as gloves and goggles.
- Measure out your oils and fats, and heat them gently on the stove until they reach the desired temperature.
- In a separate container, carefully measure the lye, ensuring you follow safety precautions and handle it cautiously.
- Slowly add the lye to a predetermined amount of water, stirring gently until it dissolves completely.
- Allow the oil mixture and the lye solution to cool to a similar temperature, around 100-110°F (38-43°C).
- Slowly pour the lye solution into the oils, stirring continuously.
- Use a stick blender to mix the ingredients until they reach a light trace, resembling the texture of thin pudding.
- You can add Colorants, Fragrance Oils, Essential Oils, or any desired additives to your soap mixture.
- Pour the soap batter into a mold of your choice, ensuring it is level and smooth on top.
- Cover the mold with a lid or plastic wrap and insulate it with a towel or blanket to promote saponification.
- Allow the soap to cure for 4-6 weeks, checking periodically for hardness and pH level.
- Once fully cured, remove the soap from the mold, cut it into bars, and let it air dry for an additional few weeks before use.
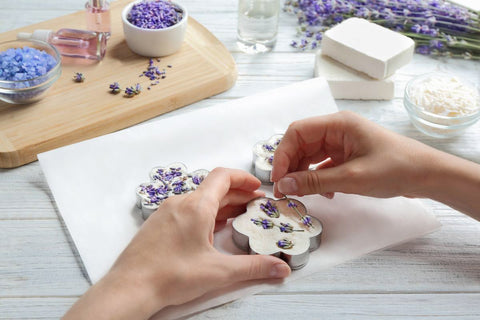
2. Melt and Pour Soap Making
Melt-and-pour soap making is a beginner-friendly and convenient method that allows you to craft unique and customized soap bars easily. With pre-made soap bases and endless possibilities for creativity, it's a great way to dive into soap making. Follow these step-by-step directions to get started with the melt-and-pour soap making method.

- Gather your melt-and-pour soap base, readily available in craft stores or online.
- Cut the soap base into small, uniform pieces to ensure even melting.
- Place the soap base in a microwave-safe container or a double boiler.
- Melt the soap base using short bursts in the microwave or gentle heat on a stove, stirring occasionally.
- Once the soap base is completely melted and smooth, you can add Colorants, Fragrance Oils, Essential Oils, or any desired additives.
- Stir gently to incorporate the additives evenly into the melted soap base.
- Prepare your soap molds by spraying them with rubbing alcohol to prevent any air bubbles from forming.
- Pour the melted soap mixture into the molds, filling them to the desired level.
- If desired, add additional layers or embed objects into the soap by allowing the first layer to partially solidify before pouring the next layer.
- Allow the soap to cool and harden completely, usually within a few hours.
- Once hardened, gently pop the soap out of the molds.
- Trim any rough edges or excess soap if necessary.
- Allow the soap bars to cure for a few days to harden further before using or packaging.
3. Hot Process Soap Making
Hot process soap making is an ancient technique resulting in rustic, textured bars of soap with a shorter curing time than the cold process. This method involves cooking the soap mixture, allowing for faster saponification. Follow these step-by-step directions to embark on your hot process soap making method.

- Prepare your workspace by ensuring it is well-ventilated and wearing protective gear such as gloves and goggles.
- Measure out your oils and fats and heat them in a large pot or slow cooker until they melt completely.
- In a separate container, carefully measure the lye, ensuring you follow safety precautions and handle it cautiously.
- Slowly add the lye to a predetermined amount of water, stirring gently until it dissolves completely.
- Once the oil mixture and the lye solution are at a similar temperature, around 100-110°F (38-43°C), slowly pour the lye solution into the oils, stirring continuously.
- Use a stick blender to mix the ingredients until they reach a thick trace, resembling the pudding texture.
- Transfer the soap mixture back to the heat source, such as the pot or slow cooker, and cover it.
- Cook the soap mixture on low heat, stirring occasionally to prevent scorching, for about 1-2 hours until it goes through the gel phase and becomes fully saponified.
- During the cooking process, you can periodically check the soap's consistency by performing a zap test, ensuring no traces of lye remain.
- Once fully saponified, you can add colorants, fragrance oils, essential oils, or any desired additives to your soap mixture and stir them in thoroughly.
- Spoon or pour the hot soap batter into the molds of your choice, ensuring they are level and smooth on top.
- Allow the soap to cool and harden in the molds for a few hours.
- Once hardened, gently remove the soap from the molds.
- Trim any rough edges or excess soap if necessary.
- Although hot process soap is technically ready for use immediately, allowing it to cure for 1-2 weeks will result in a harder, longer-lasting bar.
4. Rebatching Soap
Rebatching soap, also known as hand milling, is a technique that involves melting and reforming pre-existing soap bars. It's an excellent method for repurposing soap scraps or creating custom blends with added ingredients. Follow these step-by-step directions to dive into the rebatching soap making method.

- Gather your soap scraps or pre-existing soap bars that you want to rebatch.
- Grate or chop the soap into small, uniform pieces to facilitate melting.
- Place the soap pieces in a heat-safe container, such as a double boiler or a microwave-safe bowl.
- Add a small amount of liquid to the soap pieces, such as distilled water, milk, or herbal tea. This will aid in the melting process.
- Heat the soap and liquid mixture gently, either in a double boiler or by microwaving in short bursts, stirring occasionally.
- Continue heating and stirring until the soap pieces have melted and blended with the liquid, forming a thick, pudding-like consistency.
- You can add ingredients such as colorants, fragrance oils, essential oils, herbs, or exfoliants to customize your rebatched soap.
- Stir the additional ingredients into the soap mixture until they are well incorporated.
- Pour the soap mixture into molds of your choice, ensuring they are level and smooth on top.
- Tap the molds gently on a countertop to remove any air bubbles.
- Allow the soap to cool and harden in the molds for several hours or overnight.
- Once hardened, gently remove the soap from the molds.
- Trim any rough edges or excess soap if necessary.
- Let the rebatched soap cure for a few weeks to harden and further meld the ingredients together before use.
Conclusion
In conclusion, these are some of the best and most prominent soap making method you can try. However, it would be best to remember that each soap-making method has benefits and disadvantages, depending on your choice. We need to find out which is the best because it all depends on the technique and working style of the soap maker. Go ahead, you can try all these methods and then decide which one goes the best for you!
You May Also Like:
- Vegan Soap Recipe
- Soap Frosting Recipe
- Rice Bran Oil Soap Recipe
- Milk and Honey Soap Recipe
- Homemade Cold Process Swirl Soap Recipe

Reviewed by:
Anjali Sharma
Anjali Sharma is a cosmetic & skincare formulation chemist with experience in developing products with over 5 years of experience in the Skincare and cosmetic industry.
Buy Products
-
 ₹489.00 ₹1,000.00
 -
 ₹399.00 ₹450.00
 -
 ₹429.00 ₹600.00
 -
 ₹749.00 ₹1,500.00
 -
 ₹149.00 ₹300.00


 Home
Home Search
 Shop
Shop Chat
Chat Profile