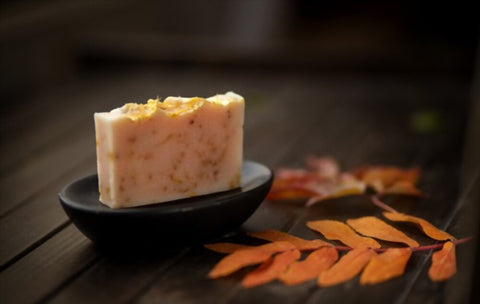
These issues are common whether it's air bubbles in soap, strange cracks, or a rough surface. But don’t worry, you’re not alone! This guide will walk you through clear and easy soap-making tips for a smooth finish. Whether you use a cold process or melt and pour methods, you’ll find everything you need here to make bars look clean, smooth, and beautiful.

We'll highlight the common mistakes that lead to bubbles, helping you steer clear of them from the very beginning.
Why Do Bubbles Form in Handmade Soap?
Some reasons behind bubble formation in handmade soap are given below:
Air Trapped During Mixing
- Mixing too quickly can trap air into your soap batter, causing bubbles.
- Use a slow and steady pace, whether blending or stirring by hand.
- Gently tap the container after mixing to release trapped air bubbles.
Pouring Mistakes

- Pour slowly and from a low height to avoid pulling air into the mix.
- Avoid pouring when the soap base is too hot, as it can cause texture issues or lines.
Mould Shape and Material
- Intricate moulds may trap air, while silicone moulds allow for smooth release.
- Always tap the mould after pouring to release air bubbles.
Bubbles in Cold Process Soap – What to Watch Out For
Some precautions to be followed to avoid bubbles in cold-process soaps are listed below:

Over-blending or High-Speed Mixing
- High-speed blending can whip too much air into the batter.
- Use low or medium speed and stop as soon as trace is reached.
Not “Burping” the Stick
- Before blending, tilt the stick blender into the oils—like coconut oil, olive oil, or castor oil—and gently tap or swirl it.
- This releases trapped air in the blender head.
Pouring Too Fast or from Too High
- Pouring too fast traps air—go slow and stay close to the mould surface.
Tapping the Soap Mould is a Must
- After pouring, tap the mould gently on the counter to release bubbles.
Mixing at Lower Temperatures

- Cooler temperatures give better control and reduce trapped air.
- Leads to a cleaner, smoother bar of soap.
Bubbles in Melt and Pour Soap – Causes & Fixes
Some causes in melt and pour soaps and their quick fixes are shared below:
Overheating the Base
- Overheating causes bubbles, odd textures, or discoloration.
- Use short microwave bursts or a gentle double boiler to control heat.
Stirring Vigorously
- Fast stirring traps air—use a spatula or low-speed mixer gently.
Skipping the Rubbing Alcohol Spray
- Spray 91% isopropyl alcohol immediately after pouring to pop surface bubbles.
Letting the Base Sit Before Pouring
- If the base sits too long, it thickens and traps air.
- Pour while still warm and fluid, not hot.
Tips to Prevent Bubbles in Any Soap Recipe

- Stir slowly to avoid creating air pockets.
- Always burp your stick blender before turning it on.
- Pour soap slowly and close to the mould surface.
- Tap the mould firmly after pouring to let bubbles escape.
- For melt and pour soaps, spray rubbing alcohol right after pouring.
- Avoid high-speed mixing to prevent a bubbly look.
Can You Fix Soap That Already Has Bubbles?
No worries if your soap ends up with a few bubbles—it’s not a lost cause! For melt and pour soap, you can just gently re-melt the base and pour it slowly into a clean mold. A little patience goes a long way in giving it a smooth second chance.
Does Soap With Bubbles Still Work?
Don’t worry if your homemade soap has a few bubbles or isn’t picture-perfect—it’ll still lather beautifully and clean just as effectively. These tiny flaws are purely cosmetic and won’t affect performance. If you're planning to gift or sell your soap, you can always smooth the surface or rebatch it for a more polished, professional look.
Final Thoughts – Practice Makes Perfect
Learning to keep bubbles out of your soap takes a bit of practice, but every batch teaches you something new. A few bubbles here and there? Totally normal and purely cosmetic. A few bubbles popping up? No big deal, they are just cosmetic and won’t affect how your soap works. With a bit of mindful mixing, careful pouring, and easy tricks like tapping the mold or giving it a quick spritz of alcohol, you’ll be crafting smooth, beautiful bars in no time.


 Sign in
 Register now
 My Reward Points


